How it works
Scanreference application
Most of today's scanners usually scan surface patches in one go with a size between 200 mm x 300 mm and 400 mm x 600 mm. For scanning larger objects it is necessary to stick these single patches together to a large point cloud. Therefore two different approaches were used.
One is cloud matching where two patches are matched in the overlapping area with a best fit surface match. This is a suitable approach when the surface is not too smooth and no ambiguities appear.
The safe and accurate approach for large objects is the use of reference points which provide control information covering the whole part and not only in the overlapping area.
Scanreference is a tool to create these networks of control points for the matching of single scanned point clouds.
Scanreference can measure parts from a few centimetres up to many meters in size, even objects as large as entire aircrafts can be measured.
Measuring principle
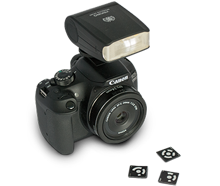
Scanreference is a portable 3D measuring tool that uses a high resolution digital camera for data collection. The reference points are signalised with circular targets stuck onto the parts surface.
In addition coded targets and a scale bar are added to the object to allow the image matching and scaling process.
The object, which may be of any size, is photographed from a number of directions. These images are processed after data collection with the powerful scanreference software that runs on any standard computer.
The software automatically calculates the 3D coordinates of all targeted points. The calculation is based on the principle of spatial image triangulation (photogrammetry) and is fully automated.
Pre-calibration of the camera is not necessary because the software employs an integrated simultaneous calibration procedure.
Finally the resulting 3D coordinates are transferred to the scanning or post processing software to allow the cloud matching in these software packages.
See how it works in the scanreference tutorial!


